Initializing MoEngage SDK
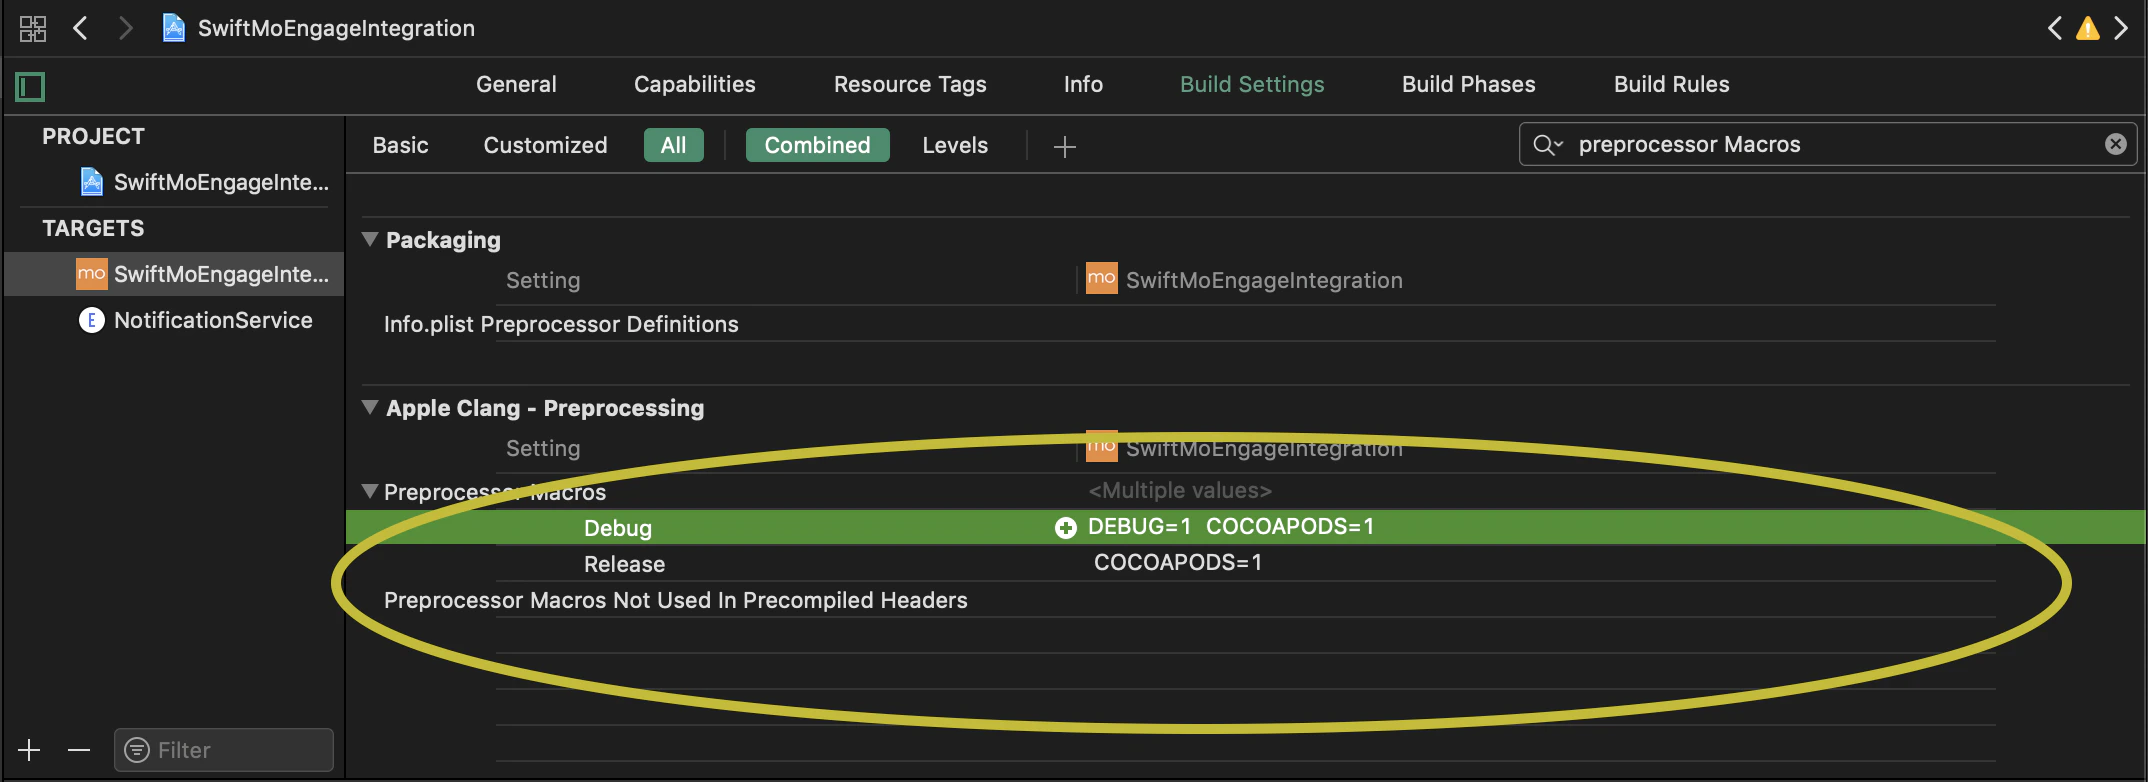
First, go toBuild Settings of your App Target and ensure that DEBUG Preprocessor Macro is defined in Debug section as shown in the below image, if not present then add the same by entering DEBUG=1 in Debug section:
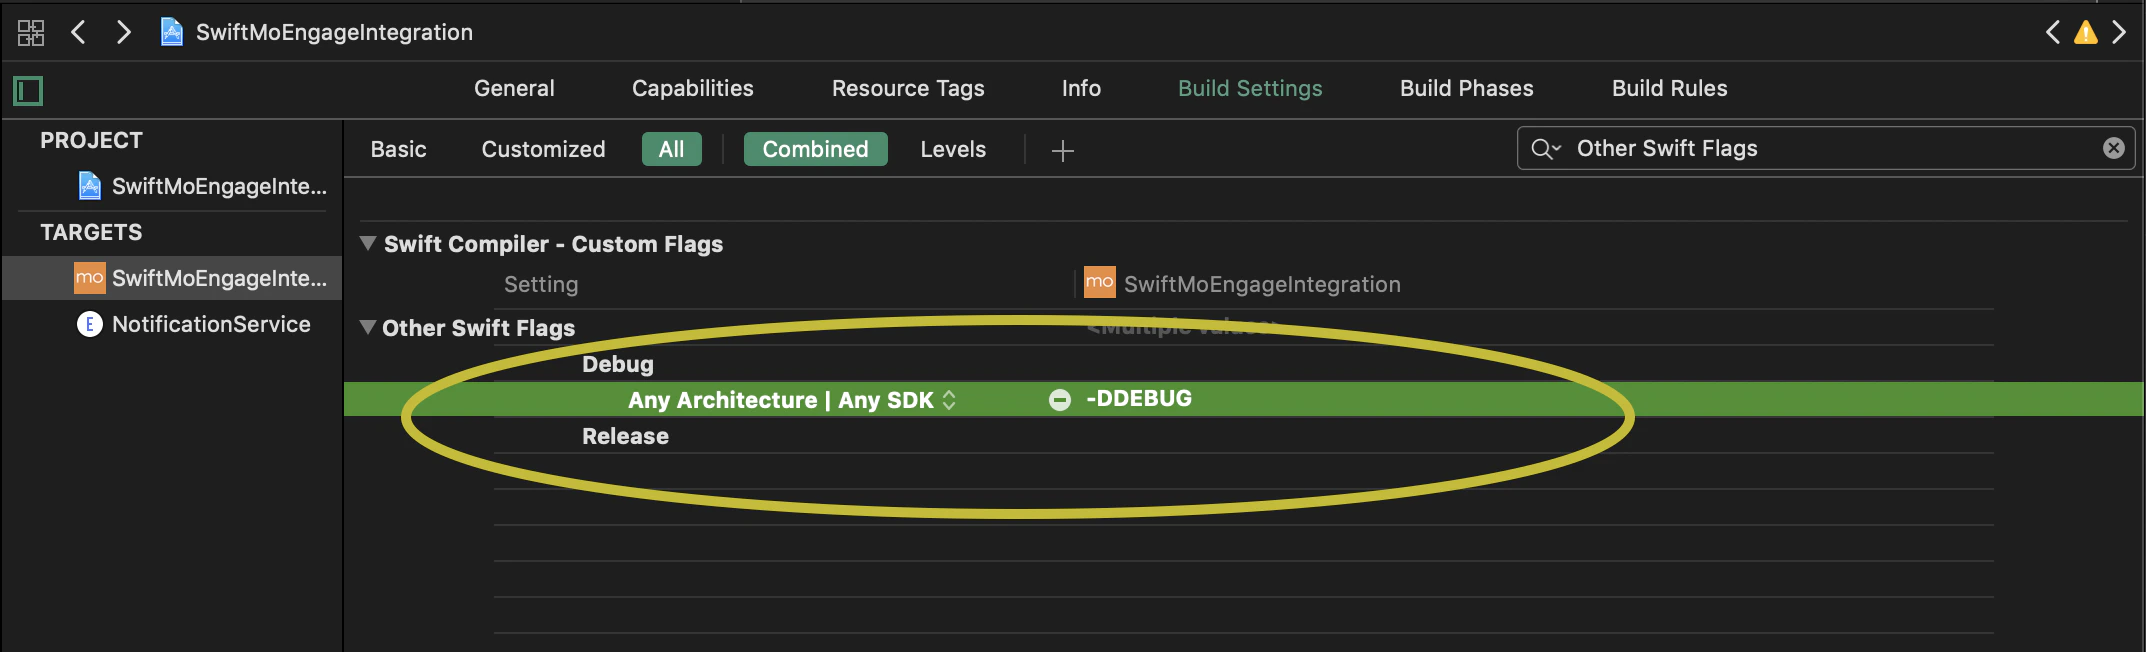
App Target Build Settings make sure -DDEBUG is added to Debug section in the Other Swift Flags as described in the image:
-
in to your MoEngage account, go to Settings in the left panel of the dashboard. Under General Settings, you will find your Workspace ID. Provide this Workspace ID along with the Datacenter while initializing the SDK with MoEngageSDKConfig instance . UseinitializeDefaultTestInstance(_:) and initializeDefaultLiveInstance(_:) methods as shown below.
-
In your MoEngage account, if your portfolio is configured with multiple projects, Provide the respective Project ID along with the Datacenter while initializing the SDK with MoEngageSDKConfig instance . Use initializeDefaultTestInstance(_:) and initializeDefaultLiveInstance(_:) methods as shown below:
| Data Center | Dashboard host |
|---|---|
| DataCenter.DATA_CENTER_1 | dashboard-01.moengage.com |
| DataCenter.DATA_CENTER_2 | dashboard-02.moengage.com |
| DataCenter.DATA_CENTER_3 | dashboard-03.moengage.com |
| DataCenter.DATA_CENTER_4 | dashboard-04.moengage.com |
| DataCenter.DATA_CENTER_5 | dashboard-05.moengage.com |
| DataCenter.DATA_CENTER_6 | dashboard-06.moengage.com |
Notedata_center_06 is available from MoEngage-iOS-SDK version 9.17.3 onwards
Test/Live Environment
As mentioned above while initializing the build, MoEngage SDK makes use of theDEBUG preprocessor macro to decide whether the build is meant for TEST/LIVE Environment. Therefore, you will have to take care of the same while generating the build and make sure that the Build Configuration of the App’s target is set as mentioned below:
- For Development Build: Build Configuration should be set to Debug (Data will be tracked in TEST Environment)
- For AdHoc Build/App Store Build: Build Configuration should be set to Release (Data will be tracked in LIVE Environment)
How to set Build Configuration?
Build Configuration on Running the app from Xcode:
Whenever you run the app directly from Xcode without archiving, make sure the build configuration of Run mode of the App Target in Edit Scheme is set to Debug(set by default settings). Doing this will make sure data is tracked in TEST Environment.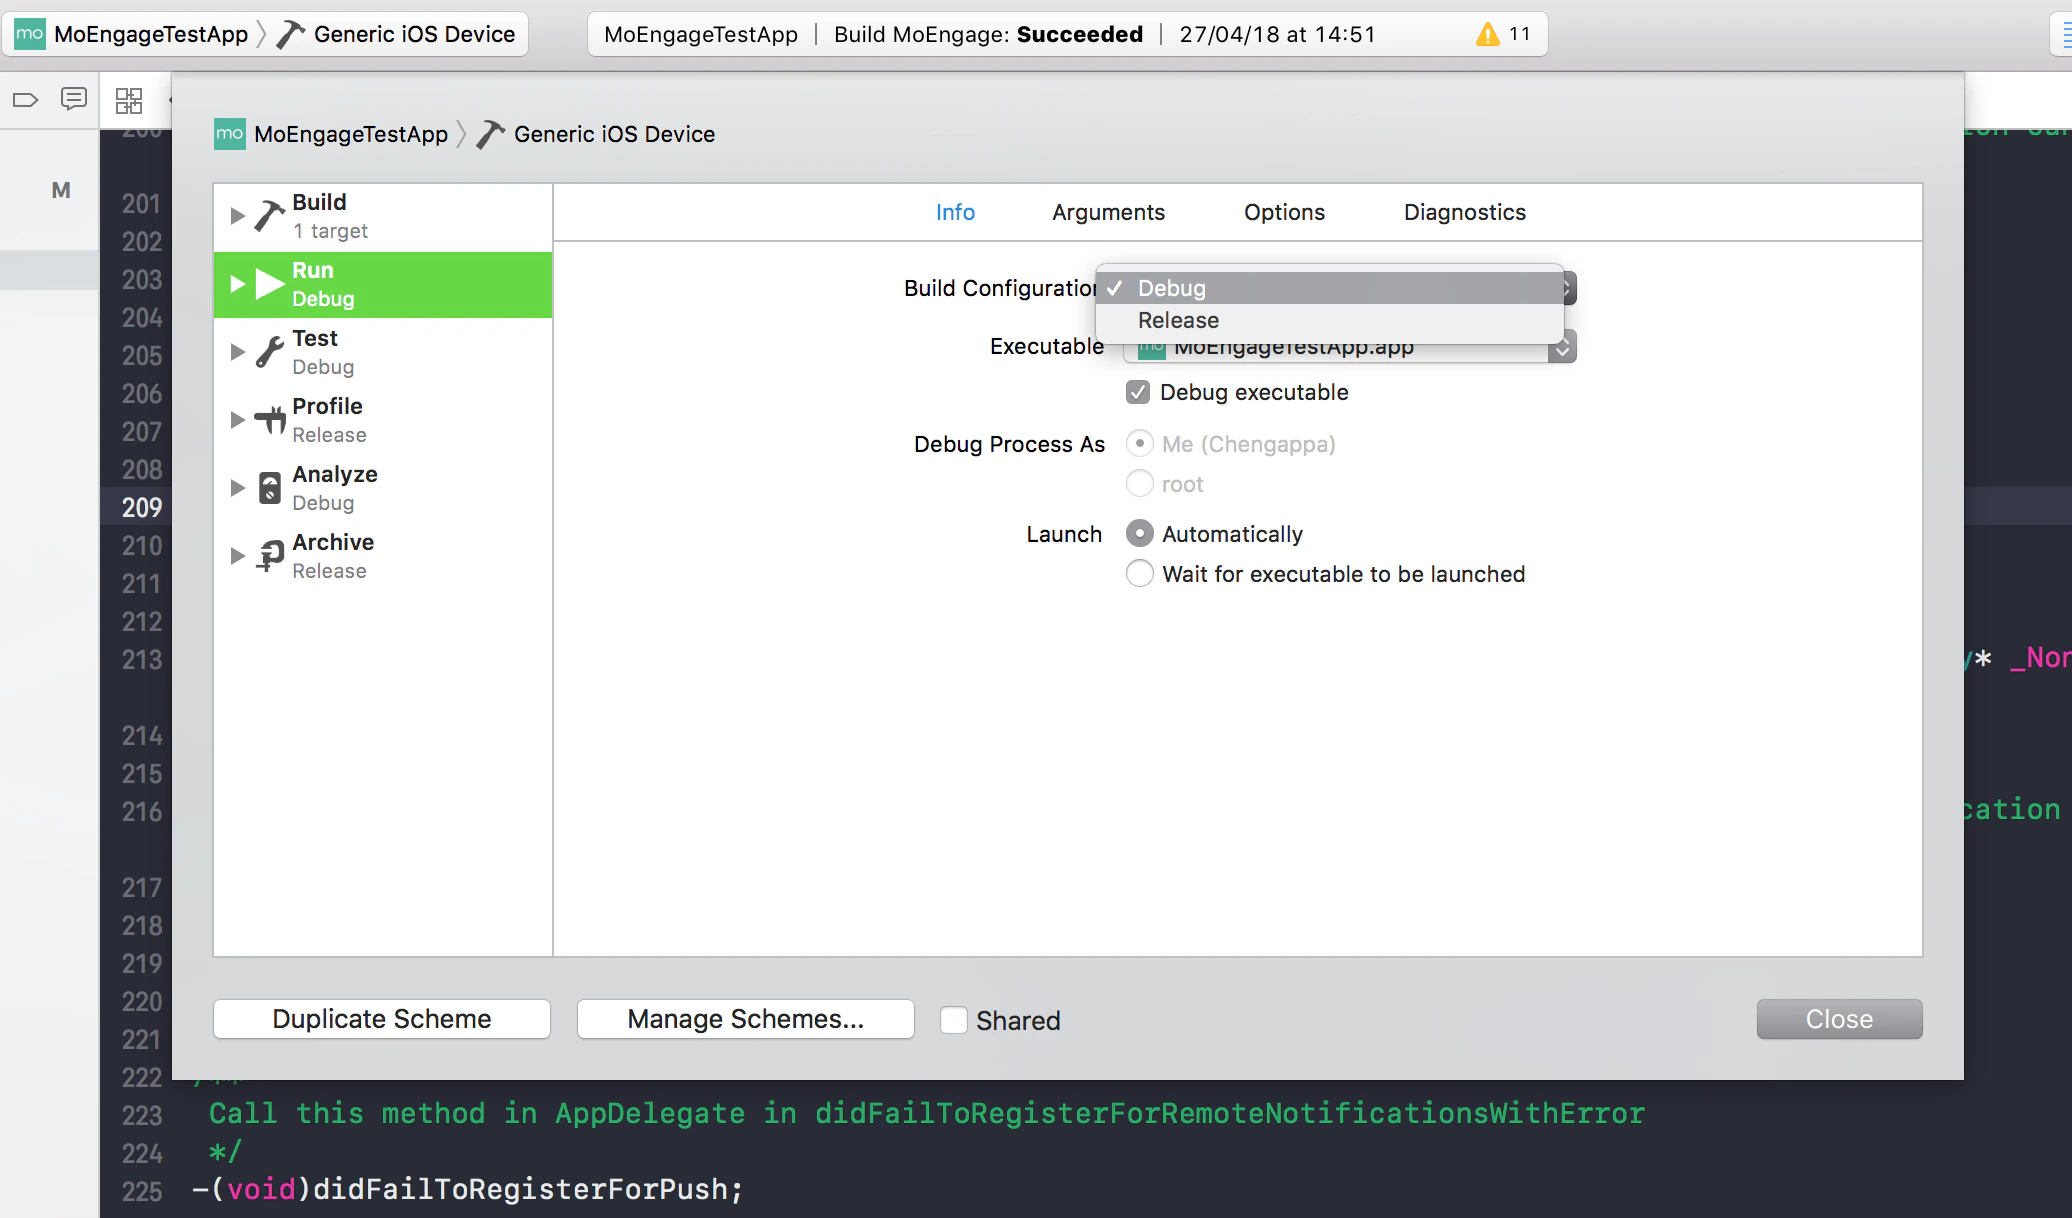
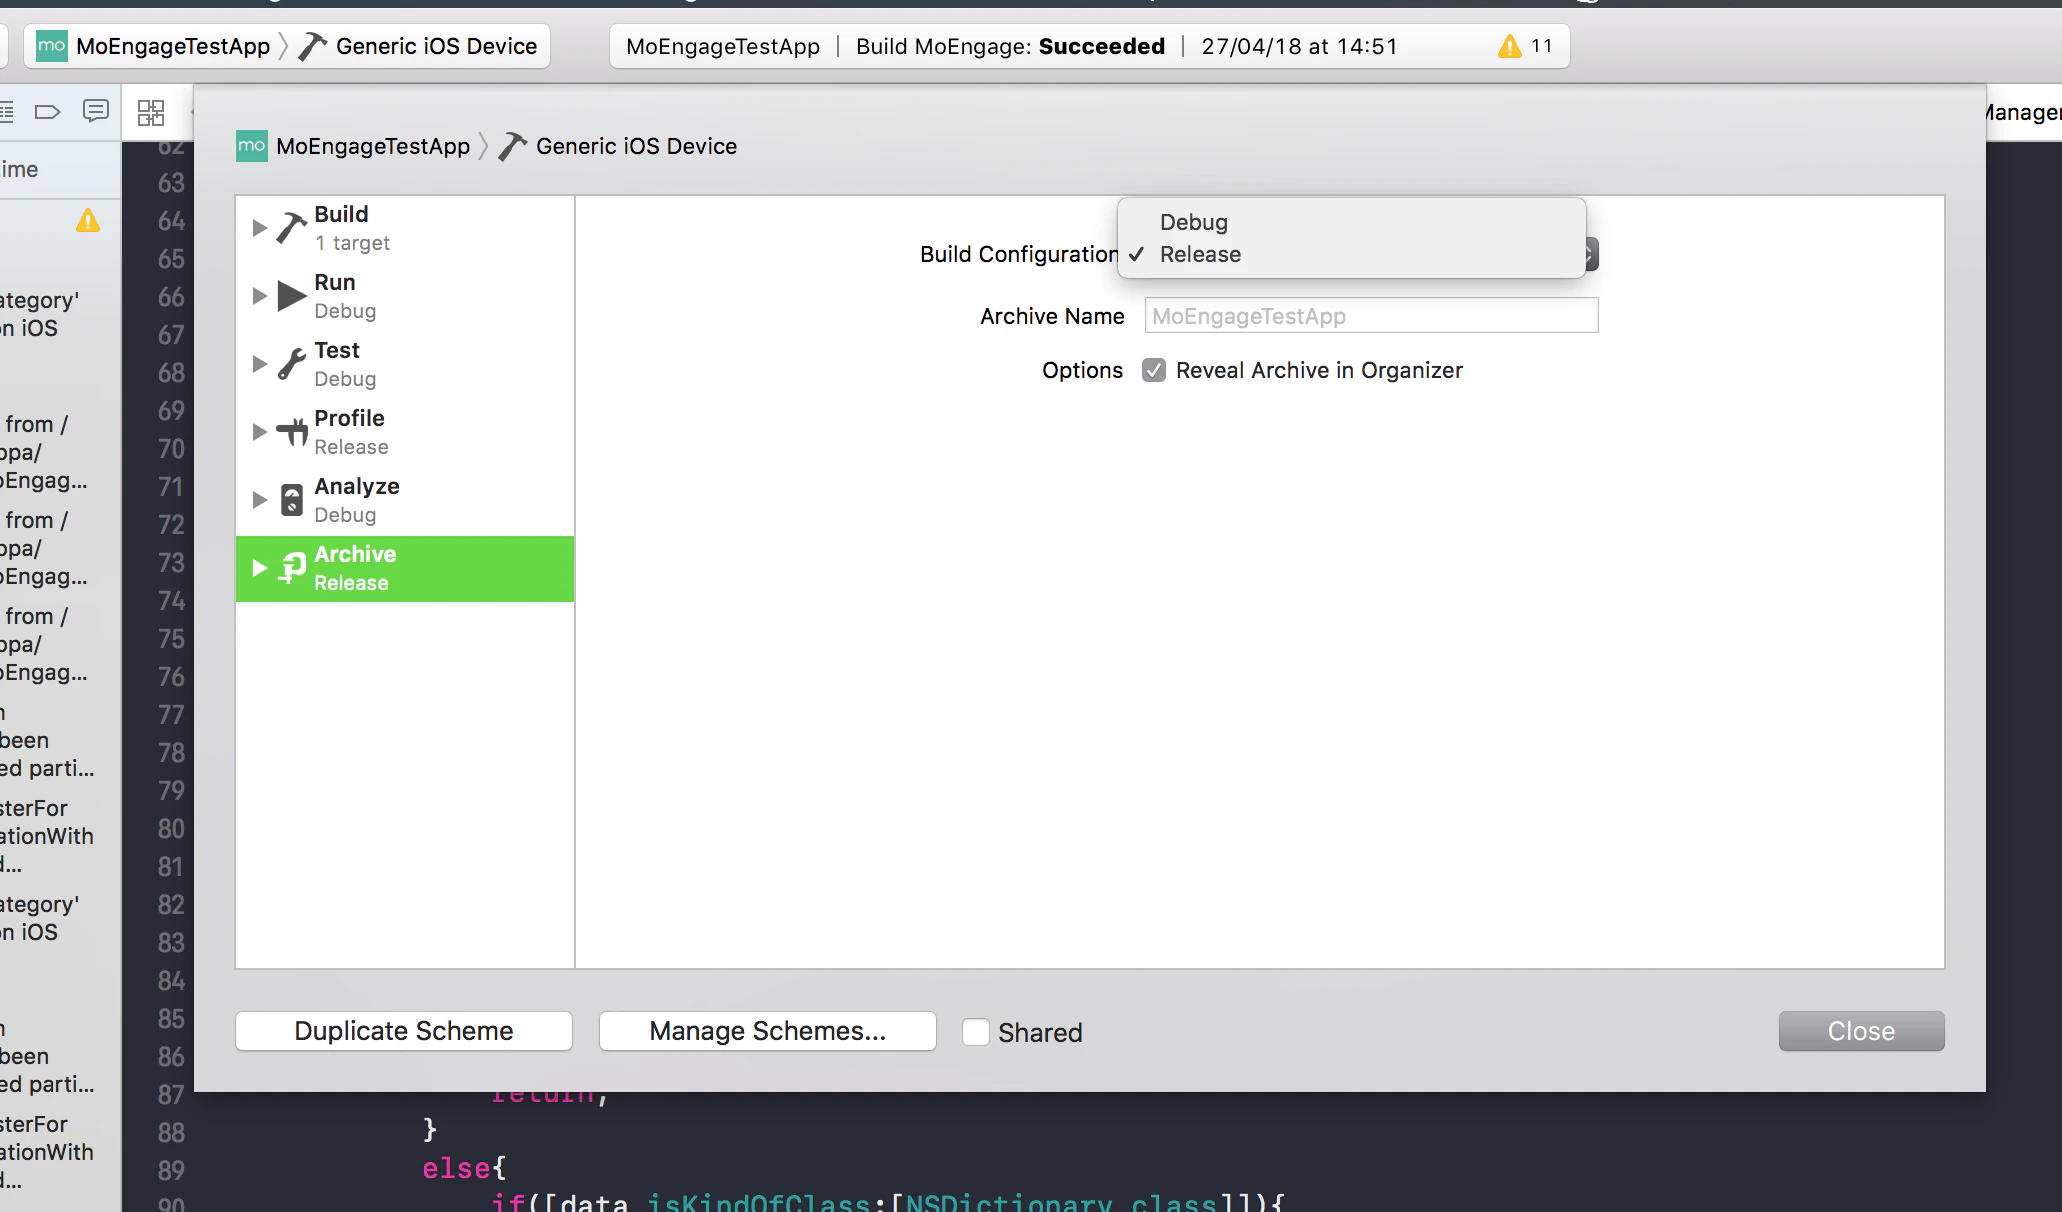
Build Configuration on Exporting the build:
While exporting the build make sure you set the correctBuild Configuration. By default for Archive section in Edit Scheme the Build Configuration will be set to Release, but for a development build make sure its changed to Debug before exporting the build. To set the Build Configuration of the build in your Xcode project go to App Target > Edit Scheme > Archive > Build Configuration and set the configuration to Debug/Release(depending on the type of build). Refer to the image as described: